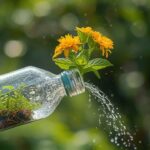
How many of your beloved houseplants have you accidentally drowned? If you’ve ever watched a thriving plant slowly collapse despite your devoted care, overwatering is almost certainly the culprit. It is the single most common reason houseplants perish, and the sad irony is that the more attentive you are, the more likely you are to overwater. This guide breaks down exactly how to recognize the signs, fix the problem, and protect your green friends from soggy roots for good.
Table of Contents
Materials & Supplies
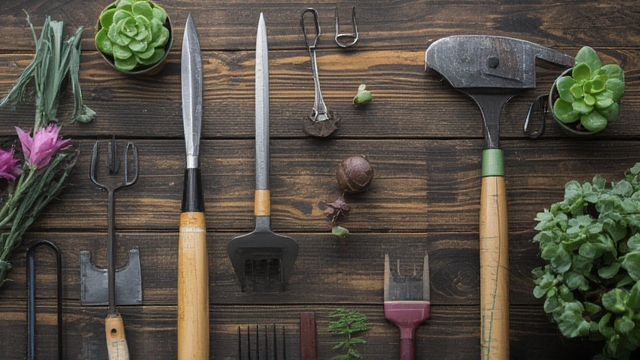
Before you diagnose and treat an overwatered plant, gather these essential tools. Having them on hand will make every step faster, cleaner, and far more effective.
- Moisture meter — a battery-free soil probe that tells you exactly how wet the root zone is. This is your single most valuable tool and eliminates guesswork entirely.
- Trowel or hand fork — for gently inspecting the root system without causing major disturbance.
- Well-draining potting mix — a peat-based or cactus mix that aerates the soil and prevents water from pooling around roots.
- Perlite or coarse sand — mixed into standard soil to improve drainage by up to 50 percent.
- Clean, sharp pruning shears — for trimming rotting roots and any affected foliage without spreading pathogens.
- Spray bottle — for misting leaves during recovery without adding water to the soil.
- Absorbent towels or paper towels — to gently press-excess moisture from saturated root balls.
- Terracotta pots — breathable clay pots that wick moisture away from soil faster than plastic or ceramic alternatives. (Optional:|Different pot material — plastic pots retain moisture longer and are better suited for very dry environments or plants that love constant moisture, such as ferns.)
Timing and Diagnosis Schedule
Timing matters enormously when it comes to overwatering. The sooner you recognize the problem, the higher your plant’s chance of full recovery.
- Initial signs appear — 3 to 7 days after the last watering, depending on the plant species and pot size. Watch for soil that stays wet deep below the surface.
- Root rot sets in — as early as 7 to 14 days of consistently soggy soil. At this stage, roots turn brown and mushy, and a foul, musty odor may develop.
- Recovery period — 2 to 6 weeks after repotting into dry, well-draining medium. Less severe cases bounce back within weeks; advanced root rot may take months.
- Prevention cadence — check soil moisture before every watering. This 30-second habit is the single most effective preventative measure you can adopt.
Step-by-Step Instructions

Step 1: Identify the Signs
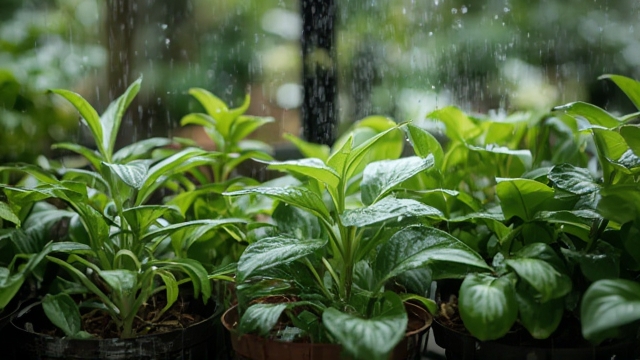
Before you take action, confirm that overwatering is indeed the problem. Yellowing leaves — particularly the lower, older ones — are often the first red flag. If the leaves feel soft, mushy, or look transparent, that’s water saturation inside the tissue. Check the soil: does it smell damp or musty? Does it remain wet two inches below the surface more than 48 hours after watering? If the answer is yes, you’re overwatering. A moisture meter reading above 7 (on a 1–10 scale) confirms saturated soil.
Step 2: Stop Watering Immediately
Cease all watering at once. Move the plant to a location with bright, indirect light — this encourages faster soil evaporation. If the pot sits inside a decorative planter (a cachepot), remove it so air can circulate freely around the drainage holes.
Step 3: Inspect the Root System
Gently remove the plant from its pot. Shake off excess wet soil and examine the roots. Healthy roots are firm, white, or tan-colored and feel crisp. Rotten roots appear dark brown or black, feel soft and slimy between your fingers, and may pull apart easily. Using clean pruning shears, trim away every single rotted root, cutting well back into healthy tissue. Rinse the shears with rubbing alcohol between cuts to avoid transmitting pathogens.
Step 4: Repot into Fresh, Well-Draining Medium
Discard the saturated soil entirely — it harbors fungal pathogens. Fill a clean pot with a fresh, well-draining potting mix amended with perlite (use roughly one part perlite to three parts mix). Repot the plant at the same depth it was growing before. Do not water immediately; wait 5 to 7 days to allow cut roots to callus and heal, then water sparingly using the bottom-up method (placing the pot in a tray of water for 15–20 minutes so moisture wicks upward to the roots without saturating the topsoil).
Step 5: Monitor and Adjust
Check the soil moisture every 2 to 3 days using your moisture meter or the finger test (insert your finger two inches deep). Only water when readings drop to 4 or 5, or when the top inch of soil feels completely dry. Move the plant away from Drafty areas that may increase water demand, but keep it in bright, indirect light to support vigorous recovery.
Common Mistakes to Avoid
The path to overwatering recovery is littered with common pitfalls. One of the biggest mistakes is returning to a normal watering schedule too soon after repotting — your plant’s root system is traumatized and needs time to regrow its water-absorbing capacity. Never fertilize a recovering plant; burned, stressed roots cannot handle nutrients and will suffer further. Avoid the temptation to place a struggling plant in direct sunlight thinking it will dry the soil faster — intense heat stresses already compromised foliage, often causing leaf scorch. Finally, do not reuse the old, soggy soil. Even if it appears dry, it almost certainly harbors fungal spores that caused or contributed to the root rot in the first place.
Storage and Maintenance Tips
Long-term overwatering prevention comes down to three habits. First, always use a pot with drainage holes — no exceptions. Second, adjust your watering frequency seasonally: plants grow slowly in winter and require far less water than in summer. Third, invest in that moisture meter. It costs roughly ten dollars, lasts for years with no batteries, and virtually eliminates the guesswork that leads to overwatering.
For plants that genuinely love moisture — peace lilies, pothos, monsteras — consider the “soak and dry” method: water thoroughly until water runs out the drainage holes, then let the soil dry out completely before the next watering. This mimics natural rainfall cycles and keeps roots healthy and oxygenated.
Conclusion
Overwatering does not mean you don’t care for your plants — it simply means you’re showing love in the wrong currency. By learning to read the signs, acting quickly to rescue soggy roots, and building better watering habits, you give your houseplants the exact environment they need to flourish. Start with one plant today: check the soil, resist the urge to water “just in case,” and watch your green companions thrive. Share your recovery stories with us — we’d love to hear which plants you’ve saved!
Frequently Asked Questions
How often should I water most houseplants?
Most houseplants prefer drying out between waterings. A good general rule is to check the soil every 7 to 10 days, but always confirm with a moisture meter or the finger test, since frequency varies by plant species, pot size, season, and humidity levels.
Can a plant recover from severe root rot?
Yes, many plants can recover from root rot if接过 you catch it early enough and trim away all diseased roots. The plant will need fresh soil, excellent drainage, and patient care for several weeks while new, healthy roots grow back.
Should I water my plant from the top or the bottom?
Bottom watering is often better for overwatered plants or those prone to root rot, because it encourages deep root growth and keeps the topsoil from staying perpetually wet. For most healthy plants, top watering is fine as long as water flows freely through the drainage holes.
Do terracotta pots help prevent overwatering?
Yes, terracotta is porous and naturally wicks moisture away from soil, making it an excellent choice for plants that are prone to overwatering or for gardeners who tend to water too frequently. Just be aware that terracotta dries soil out faster, so you may need to water slightly more often.