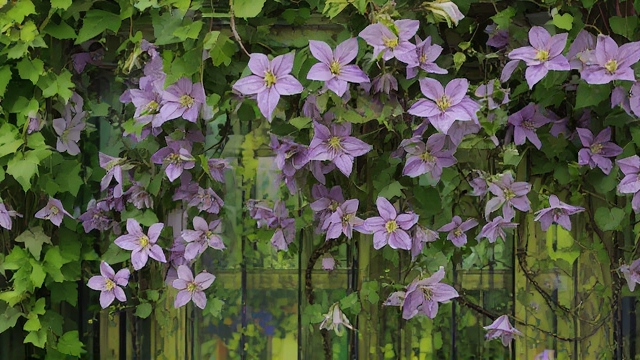
Are you yearning for a garden that steals the spotlight each summer? Learn the secrets to cultivating breathtaking Clematis Vines right in your backyard. Whether you dream of cascading royal purples, elegant whites, or vibrant pinks, this timeless climber adds height, drama, and year‑after‑year beauty. In this guide you’ll discover essential supplies, a practical planting schedule, and step‑by‑step care tips that turn even a novice gardener into a Clematis pro. Let’s dive in and transform your outdoor space into a floral masterpiece.
Table of Contents
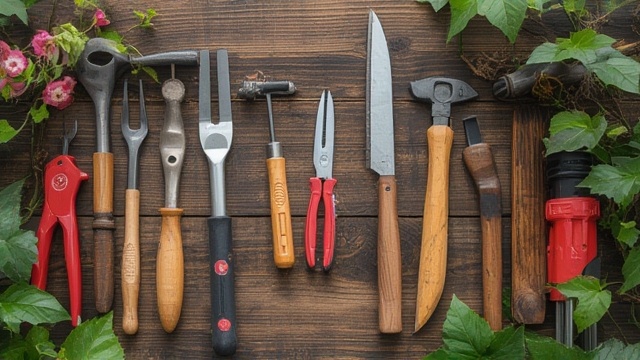
Materials & Supplies
- Clematis plant – either a potted nursery start or a rooted cutting from a reputable source.
- High‑quality potting mix – loamy, well‑draining, and rich in organic matter.
- Composted manure or organic compost – boosts nutrient availability.
- Slow‑release granular fertilizer – a balanced 10‑10‑10 or an organic rose‑formula works well.
- Support structure – trellis, arbor, pergola, or even a sturdy fence.
- Soft plant ties or garden twine – for securing vines as they climb.
- Pruning shears – sharp, bypass‑type for clean cuts.
- Watering can, drip hose, or soaker system – consistent moisture is key.
- Mulch (shredded bark, straw, or pine needles) – conserves moisture and moderates soil temperature.
- pH test kit – Clematis prefers a slightly alkaline to neutral soil (pH 6.5–7.5).
- Optional: insecticidal soap, neem oil, or organic pest control for aphid management; a decorative stake for extra support in windy spots.
Timing / Growing Schedule
- Pre‑plant prep: 2‑3 weeks before planting, amend soil with compost and test pH.
- Planting window: Early spring after the last frost or early fall (6‑8 weeks before the first frost) gives roots time to establish.
- Germination & establishment: If starting from seed, expect 3‑6 weeks for germination; cuttings root in 4‑8 weeks.
- First year growth: Vines typically reach 3‑5 feet (≈1‑1.5 m) by the end of the first growing season.
- Mature size: Most cultivars achieve 8‑12 feet (2.5‑3.5 m) tall and 3‑6 feet wide within 2‑3 years.
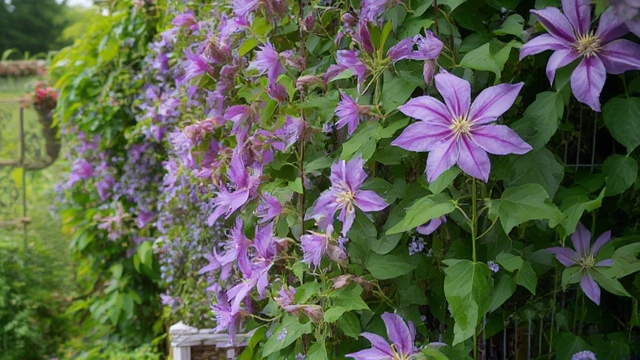
- Peak bloom: Depending on the variety, expect abundant flowers from late spring through early autumn.
Step-by-Step Instructions
- Choose the right location. Clematis thrives in full sun (6+ hours of direct light) but appreciates dappled shade at the roots. A south‑facing or west‑facing spot with sheltered roots works best.
- Prepare the soil. Mix 2‑3 inches of compost into the top 12 inches of native soil. If your soil is heavy clay, raise the planting bed or use a large container (minimum 18 inches deep).
- Create a planting hole. Dig a hole twice the width of the root ball and deep enough so the crown sits 2‑3 inches below the soil surface—this encourages basal shoots.
- Plant the vine. Place the Clematis in the hole, backfill with the amended soil, and gently firm around the roots. Water thoroughly to settle the soil.
- Install support. Attach a trellis or arbor before the vine begins climbing. Use soft ties to loosely secure the stem, allowing room for growth.
- Mulch and water. Apply a 2‑inch layer of mulch, keeping it a few inches away from the stem. Water deeply 1‑2 times per week, more during hot spells, to keep the root zone consistently moist.
- Feed regularly. After the first flush of growth, apply a slow‑release fertilizer according to package directions. Side‑dress with compost in early summer for an extra boost.
- Prune wisely. For early‑blooming cultivars, prune right after flowering to shape and remove dead wood. Late‑bloomers can be cut back hard in late winter to stimulate vigorous new canes.
- Monitor pests & disease. Check regularly for aphids, spider mites, or powdery mildew. Treat promptly with organic options like neem oil or insecticidal soap.
Nutritional Benefits / Advantages
While Clematis Vines are primarily ornamental, they contribute indirectly to a healthier garden ecosystem:
- Pollinator attraction – Their nectar‑rich flowers support bees, butterflies, and hummingbirds, enhancing biodiversity.
- Air quality – Dense foliage absorbs carbon dioxide and releases oxygen, improving local air quality.
- Soil health – Deep roots aerate the soil, and organic mulch adds organic matter as it decomposes.
- Aesthetic value – A vibrant vertical element can increase curb appeal and even property value.
Tips, Alternative Methods, or Gardening Advice
- Container gardening: Choose a dwarf or compact cultivar (e.g., Clematis ‘Arabella’) and use a 15‑gallon pot with drainage holes. Move the pot to follow the sun throughout the season.
- Raised beds: Construct a raised bed at least 18 inches deep filled with a mix of topsoil, compost, and perlite for extra drainage.
- Indoor growing: Provide a bright sunroom or greenhouse with temperatures between 60‑70°F (15‑21°C) and supplemental LED grow lights.
- Organic method: Use compost tea as a monthly foliar spray to supply micronutrients and encourage beneficial microorganisms.
- Climate adjustments: In hot climates (USDA zones 8‑9), shade the root zone with a light-colored stone or reflective mulch to keep roots cool. In colder zones (4‑6), mulch heavily in late fall to protect the crown.
Common Mistakes to Avoid
- Planting too shallow – This leads to weak root development. Always bury the crown 2‑3 inches below the surface.
- Overwatering – Soggy soil causes root rot. Water only when the top inch of soil feels dry.
- Neglecting support – Without a sturdy structure, vines sprawl and become prone to disease. Train early.
- Skipping pruning – Unpruned Clematis can become woody and produce fewer flowers. Follow the specific pruning group for your variety.
- Ignoring pH – Highly acidic soils (below pH 6.0) lock out essential nutrients. Amend with lime if needed.
Storage / Maintenance Tips
- Post‑bloom care: Remove spent flowers to encourage a second flush.
- Winter protection: In zones below 6, apply a thick layer of straw or burlap around the base after the ground freezes.
- Fertilizer schedule: Stop fertilizing in late summer to allow the plant to harden off for winter.
- Dividing mature clumps: Every 3‑4 years, divide the root ball in early spring to maintain vigor and propagate new plants.
- Tool hygiene: Sterilize pruning shears with rubbing alcohol between cuts to prevent disease spread.
Conclusion
Growing Clematis Vines is a rewarding project that transforms any backyard into a vibrant, living tapestry. With the right supplies, a mindful planting schedule, and consistent care, you’ll enjoy a cascade of spectacular blooms season after season. Ready to start? Pick your favorite variety, follow the step‑by‑step guide, and watch your garden reach new heights. Share your Clematis success story in the comments—did you try a container or an organic approach? Let’s inspire each other to create even more stunning outdoor spaces.
FAQs
1. How long does it take for a Clematis vine to bloom?
Most nursery‑grown plants will flower within the first growing season after planting, while seed‑grown vines may take 2‑3 years to mature enough to bloom.
2. Can Clematis grow in partial shade?
Yes, many cultivars tolerate light shade, but for the best flower production aim for at least 6 hours of direct sunlight. The roots should be kept cool and shaded.
3. What is the best time to prune Clematis?
It depends on the pruning group: Early‑flowering varieties are pruned right after flowering, while late‑flowering types are cut back hard in late winter or early spring.
4. How often should I water newly planted Clematis?
Water deeply 1‑2 times per week, adjusting for rainfall. The soil should stay consistently moist but never waterlogged.
5. Do I need to fertilize my Clematis every year?
A single slow‑release application in early spring is usually sufficient. Over‑fertilizing can cause excessive leaf growth at the expense of flowers.